How to Make a Cheesesteak at Home
- A four-sandwich method you can measure
- Ingredients for four cheesesteaks
- Set up before the skillet gets hot
- Brown the onion first
- Cook the beef to a verified temperature
- Slice across the grain after the rest
- Toast the rolls while the steaks rest
- Reunite, divide, and melt
- What can you change without breaking the method?
- Diagnose the sandwich, not just the ingredients
- Store leftovers as filling, not assembled sandwiches
A four-sandwich method you can measure
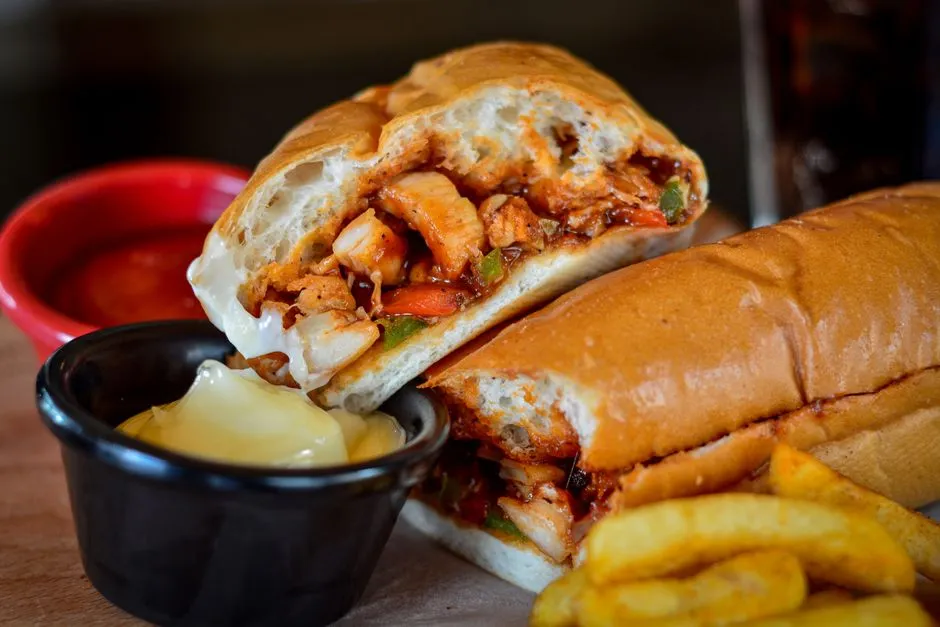
To make a cheesesteak at home, brown the onion, cook two boneless beef steaks to at least 145°F (63°C), rest them for three minutes, slice them thinly across the grain, then return the beef to the pan just long enough to mingle with the onion and melt the cheese. Toast four sturdy rolls while the beef rests. Dividing the filling before the cheese goes on keeps all four sandwiches equally loaded.
This whole-steak-then-slice method is slightly different from cooking paper-thin raw beef on a commercial griddle. It gives a home cook enough thickness to place a food thermometer correctly and confirm the temperature.
Ingredients for four cheesesteaks
- 1 1/2 pounds (680 grams) boneless ribeye steaks, ideally two pieces of similar thickness
- 1 large yellow onion, about 10 ounces (285 grams)
- 2 tablespoons (30 milliliters) neutral cooking oil, divided
- 1 teaspoon (6 grams) fine salt, divided
- 1/2 teaspoon black pepper
- 6 ounces (170 grams) sliced provolone, divided into four portions
- 4 sturdy split sandwich rolls, each about 6 to 8 inches long
- 1 tablespoon (15 milliliters) water for melting the cheese
The arithmetic is straightforward: 24 ounces of raw beef becomes 6 ounces per sandwich before cooking, and 6 ounces of cheese becomes 1 1/2 ounces per roll. Actual cooked yield changes with trimming and moisture loss, so divide the finished mixture visually into four equal portions rather than chasing a promised final weight.
Ribeye brings generous fat and tenderness. Boneless strip or sirloin can also work, but the result will be leaner; do not compensate by drowning the pan in oil. Whatever the cut, use intact whole-muscle steak for the 145°F method below. Ground or mechanically tenderized beef may carry different label instructions and safety requirements.
Check the bread and cheese labels for wheat, milk, and any other allergens relevant to the people eating. Ingredient substitutions should be chosen from labelled products appropriate to their needs.
Set up before the skillet gets hot
Heat the oven to 350°F (177°C). Set out a large skillet with a lid, a clean plate, tongs, a sharp knife, a cutting board, a wide spatula, and a food thermometer suitable for thin foods.
Keep raw beef and its plate away from rolls, cheese, and cooked ingredients. Wash hands after handling raw meat, and wash the board, knife, tongs, and any touched surfaces before they meet cooked food. The USDA Food Safety and Inspection Service summarizes the sequence as clean, separate, cook, and chill.
Slice the onion into thin half-moons. Open the rolls without cutting through the hinge. Divide the cheese into four equal piles now; this removes one small negotiation from the hot-pan stage.
Brown the onion first
Heat 1 tablespoon of the oil in the skillet over medium heat. Add the onion and 1/4 teaspoon of the salt. Cook for 10 to 14 minutes, stirring every minute or two, until the onion is soft and has browned edges.
If the pan looks dry before the onion softens, reduce the heat and add one teaspoon of water. If liquid collects, spread the onion into a broad layer and allow it to evaporate before stirring again. The goal is a soft, savory onion rather than either a pale steam bath or a tray of onion confetti.
Transfer the cooked onion to a clean bowl. Wipe out any burnt fragments, but leave a light film of browned residue if it is not scorched.
Cook the beef to a verified temperature
Pat the steaks dry with a paper towel. Season both sides with the remaining 3/4 teaspoon salt and the black pepper.
Set the skillet over medium-high heat and add the remaining tablespoon of oil. When the oil is hot but not smoking heavily, lay in the steaks with space between them. If the pan cannot hold both without crowding, cook one at a time.
Let the first surface brown without constant movement, then turn with clean tongs. Continue cooking and turning as needed until the coolest measured part of each steak reaches at least 145°F (63°C). Time is only a planning clue because steak thickness, starting temperature, pan material, and burner output vary.
The USDA thermometer guidance says to insert a thermometer from the side of a thin food until the sensor reaches the center and to measure away from bone or gristle. Remove the steak from the heat for a safer reading, follow the thermometer manufacturer's insertion instructions, and check more than one place.
Move the cooked steaks to a clean plate and leave them undisturbed for at least three minutes. FoodSafety.gov's safe minimum temperature chart gives 145°F with a three-minute rest for whole beef steaks. Color alone does not verify that temperature.
Slice across the grain after the rest
Find the direction in which the muscle fibers run, then slice across those lines rather than parallel to them. Use a sharp knife and make the slices as thin as you can safely control. Keep fingers curled away from the blade and work on a stable board.
Do not pour raw-meat juices or any liquid from the original beef package into the cooked filling. Juices on the clean resting plate after properly cooking and resting the steak can be added with the sliced beef.
For a finer texture, make one or two crosswise passes through the pile of slices. This is a chop, not a request to turn the steak into mince.
Toast the rolls while the steaks rest
Place the opened rolls cut-side up on a baking sheet. Toast at 350°F for 4 to 6 minutes, checking early, until the cut surface feels lightly crisp while the hinge remains flexible.
The crisp inner face is structural insurance against meat juices. Do not toast until the whole roll becomes brittle; a cheesesteak should bend around its filling instead of scattering across the plate on first contact.
The timing assumes an already heated oven. Bread type, moisture, and thickness change the result, so touch and color decide when the rolls come out.
Reunite, divide, and melt
Return the onion to the skillet over medium heat. Add the sliced beef and any juices from its clean resting plate. Toss for 30 to 60 seconds, just until everything is hot. This is not a second long cooking session; prolonged heat will make the already-safe beef drier.
Shape the mixture into an even layer and divide it into four equal roll-length portions. Put 1 1/2 ounces of provolone over each portion. Add the tablespoon of water to an empty edge of the skillet, cover immediately, and reduce the heat to low.
Check after 30 seconds. Remove the lid as soon as the cheese has softened and melted to your liking, usually within 30 to 60 seconds. Keep hands and face away from the steam when lifting the lid.
Slide one portion into each toasted roll with a wide spatula. Serve immediately. The sequence matters: rolls finish while beef rests, slicing happens while the oven does its work, and cheese enters only after four portions exist. Sandwich fairness is easiest to achieve before the provolone conceals the evidence.
What can you change without breaking the method?
Use the same four-part structure for variations:
| Change | How to handle it |
|---|---|
| Leaner steak | Watch the temperature closely and shorten the final rewarming step |
| Different melting cheese | Divide 6 ounces equally and check the allergen label; melting behavior will vary |
| Peppers or mushrooms | Cook them fully with or after the onion, then remove them before the beef goes in |
| Smaller rolls | Weigh or estimate four equal filling portions first; do not overfill and hope the hinge negotiates |
| Half batch | Use 12 ounces beef, 5 ounces onion, 1 tablespoon oil, 1/2 teaspoon salt, 1/4 teaspoon pepper, 3 ounces cheese, 2 rolls, and about 1 1/2 teaspoons water |
The half-batch conversion divides every major quantity by two. Oven temperature and safe internal temperature do not change. Pan cooking times still depend on thickness and equipment.
For poultry rather than beef, use the separate chicken cheesesteak recipe, which carries its own 165°F endpoint and pan sequence. The hot sandwich collection keeps complete recipes together.
Diagnose the sandwich, not just the ingredients
| Problem | Likely cause | Fix next time |
|---|---|---|
| Beef tastes dry | It overshot the target or reheated too long after slicing | Check earlier, rest at the verified endpoint, and shorten the final toss |
| Beef seems chewy | Slices run with the grain or are too thick | Identify the fiber direction and cut thinly across it |
| Onion is pale and wet | Pan was crowded or heat was too low | Use a broader layer and let released liquid evaporate |
| Roll turns soggy | It was not toasted or filling sat before serving | Crisp the cut face and assemble only when everyone is ready |
| Cheese barely softens | Portions were cool or the skillet was not covered | Warm the divided portions, add measured water at the edge, and cover briefly |
| Filling escapes immediately | Portions exceed the roll's capacity | Use sturdier rolls or reserve excess filling instead of compacting it |
Do not “fix” undercooked beef by hiding it under cheese. Return it to the pan and verify the safe endpoint before serving.
Store leftovers as filling, not assembled sandwiches
If leftovers are likely, reserve a portion of hot filling before loading every roll. Put cooked filling into a shallow, covered container and refrigerate it promptly. USDA guidance says perishable food should not remain at room temperature for more than two hours, or one hour when the air temperature is above 90°F (32°C).
Store rolls separately according to their package directions. Reheat leftover filling to 165°F (74°C), the FoodSafety.gov endpoint for leftovers, and toast the bread separately. Our guide to reheating a cheesesteak without soggy bread provides the complete skillet, oven, and microwave paths. The sandwich skills hub collects the technique-first guides.
Discard food with uncertain storage history. Reheating can warm a sandwich; it cannot rewrite what happened on the counter.